您现在的位置是:网站首页> 编程资料编程资料
Python+Pygame绘制小球的实例详解_python_
![]() 2023-05-25
460人已围观
2023-05-25
460人已围观
简介 Python+Pygame绘制小球的实例详解_python_
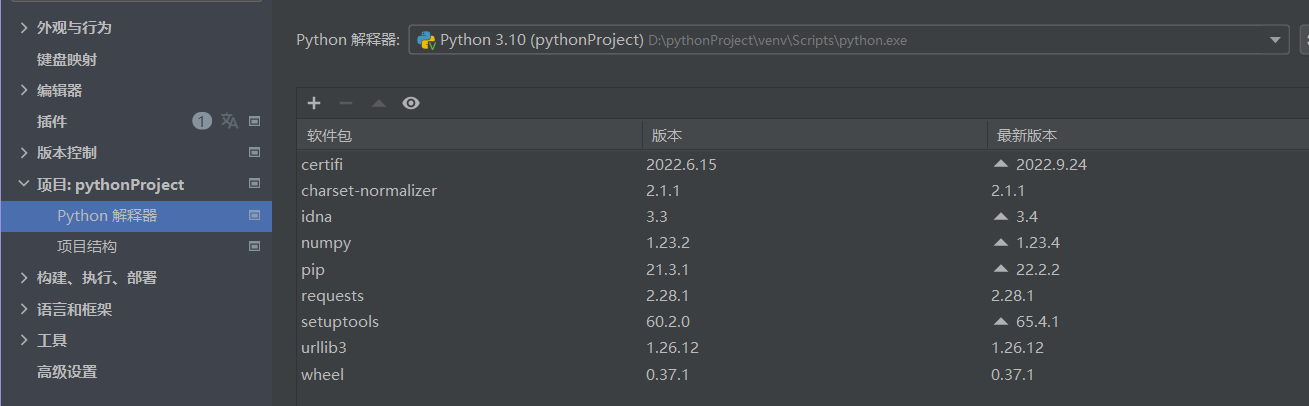
1.准备工作
1.在文件里找到设置

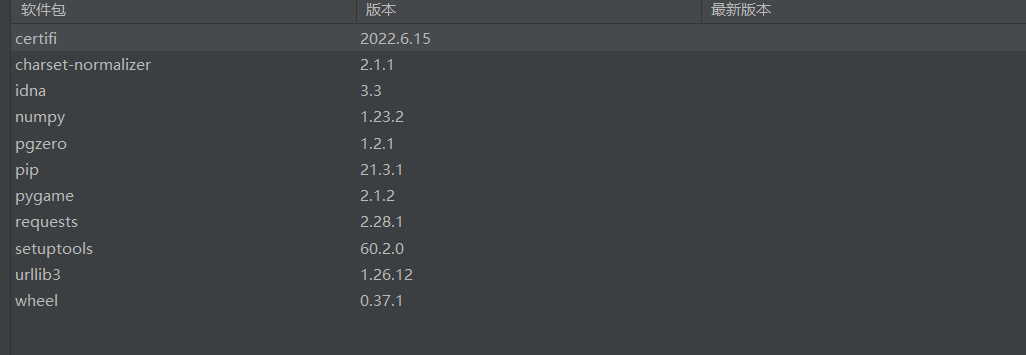
2.在项目里找到python解释器,点击右边的加号
3.搜素pygame并安装
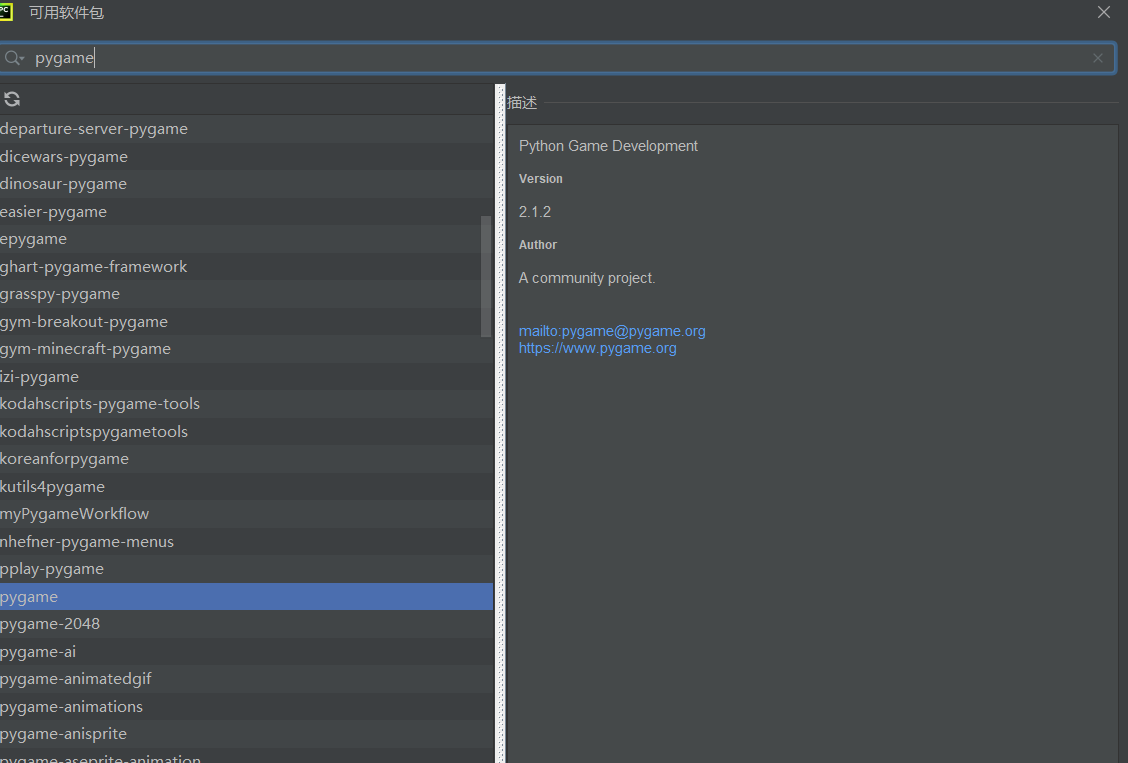
同理下载pgzero安装包
2.开始制作
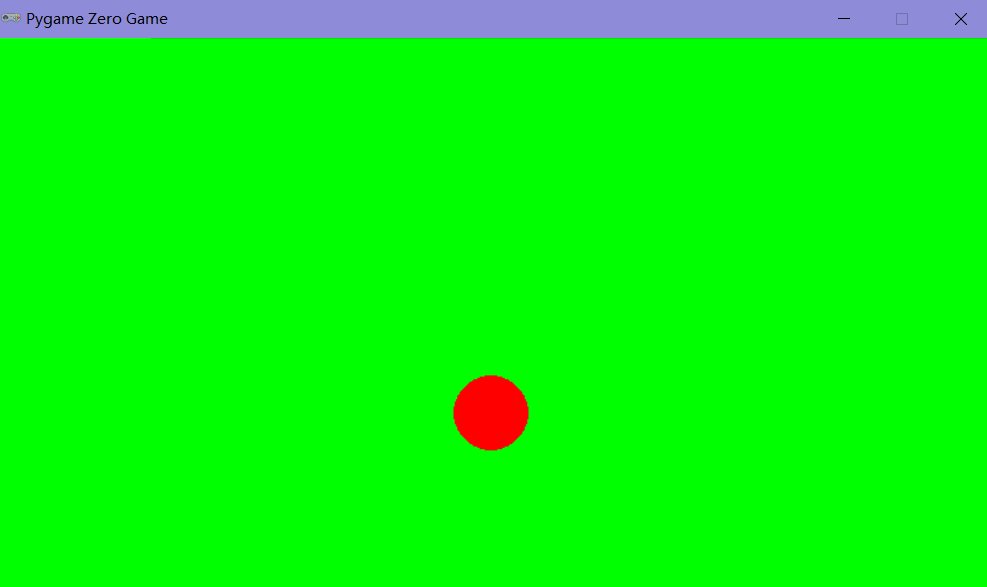
1.创建一个小球
代码
import pgzrun def draw(): screen.fill('green') screen.draw.filled_circle((400,300),30,'red') pgzrun.go()fill后面的green表示设置背景的填充颜色为绿色
filled_circle后面的(400,300)表示圆中心位置坐标,30表示圆的半径,red表示圆的颜色
执行结果
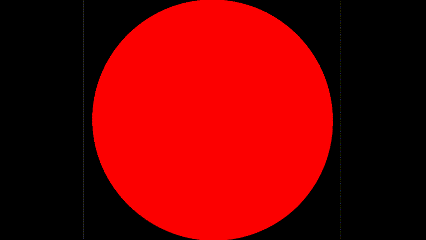
2.创建逐渐变大的小球
代码
import pgzrun r=1 def draw(): screen.fill('black') screen.draw.filled_circle((400,300),r,'red') def update(): global r r=r+1 pgzrun.go()执行结果
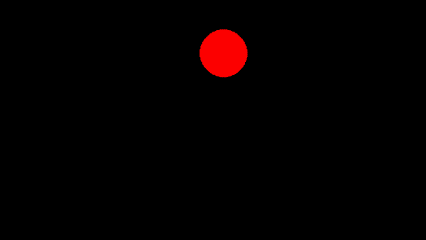
3.创建一个自由下落的小球
代码
import pgzrun y=100 def draw(): screen.fill('black') screen.draw.filled_circle((400,y),30,'red') def update(): global y y=y+1 pgzrun.go()小球的半径从1开始,每次增加1
执行结果
4.用if语句实现循环下落
代码
import pgzrun y=100 def draw(): screen.fill('black') screen.draw.filled_circle((400,y),30,'red') def update(): global y y=y+1 if y>600: y=0 pgzrun.go()5.做一个循环上下反弹的小球
代码:
import pgzrun y=100 t=3 def draw(): screen.fill('black') screen.draw.filled_circle((400,y),30,'red') def update(): global y,t y=y+t if y>=570: t=-t if y<=30: t=-t pgzrun.go()执行结果

到此这篇关于Python+Pygame绘制小球的实例详解的文章就介绍到这了,更多相关Python Pygame绘制小球内容请搜索以前的文章或继续浏览下面的相关文章希望大家以后多多支持!
您可能感兴趣的文章:
相关内容
- 教你用python实现自动回复QQ消息(不到60行)_python_
- OpenCV实战案例之车道线识别详解_python_
- 详解Python如何在终端打印字体颜色_python_
- 分享十个Python提高工作效率的自动化脚本_python_
- Python利用memory_profiler实现内存分析_python_
- Python执行dos和Linux命令的方法详解_python_
- Python Django教程之模型中字段验证详解_python_
- python提效小工具之统计xmind用例数量(源码)_python_
- Django使用装饰器限制对视图的访问及实现原理_python_
- Python Playwright的使用详解_python_


